Introduction
Fan Installation is an essential aspect of residential, commercial, and industrial infrastructure. Fans are used to regulate air circulation, improve comfort, maintain temperature, remove airborne pollutants, and support HVAC systems. From ceiling and wall fans in homes to powerful exhaust and industrial fans in factories, correct installation ensures safety, performance, and energy efficiency. This guide presents a detailed exploration of the fan installation process, covering tools, techniques, wiring instructions, safety precautions, and long-term maintenance practices.
Understanding the Different Types of Fans
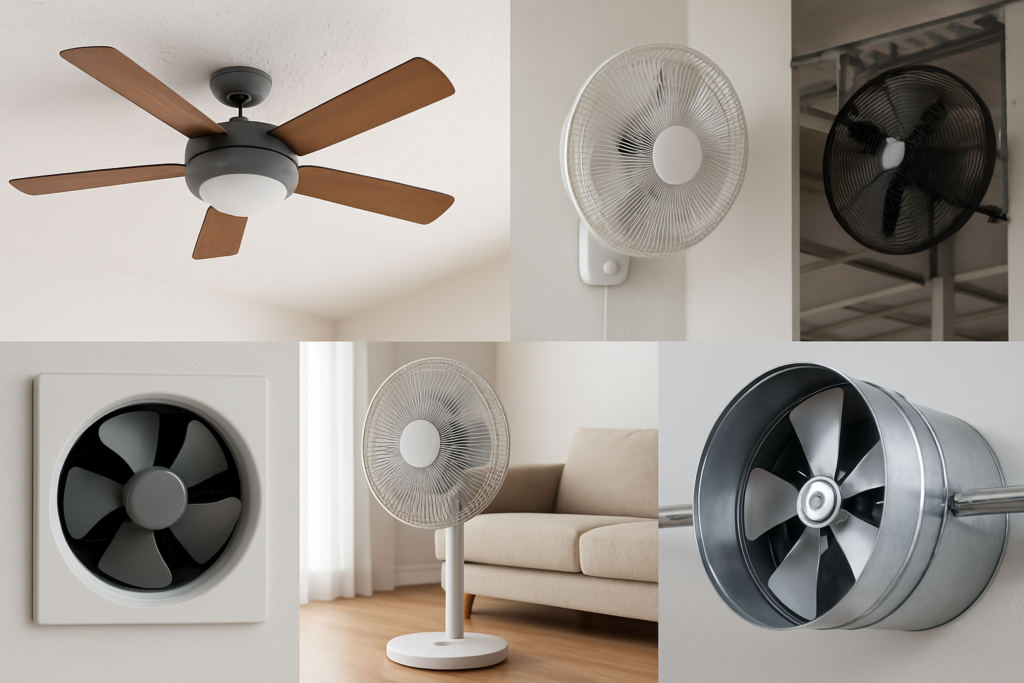
- Ceiling Fans Ceiling fans are mounted on the ceiling and are commonly used in residential and office spaces to enhance air circulation and reduce reliance on air conditioners. They come with or without integrated lighting systems.
- Wall-Mounted Fans Wall-mounted fans are ideal for locations with limited ceiling height or where targeted airflow is needed, such as workshops, garages, and small commercial areas.
- Exhaust Fans Exhaust fans are installed to expel stale air, moisture, smoke, or odors. They are commonly used in kitchens, bathrooms, attics, and warehouses.
- Pedestal and Table Fans These are portable fans used for localized airflow. They do not require permanent installation but can be wall-mounted in some configurations.
- Industrial Fans Industrial fans are large-capacity fans designed for factories, warehouses, data centers, and large commercial environments. These fans support ventilation, temperature control, and air purification on a large scale.
- Inline and Duct Fans These are used within ductwork systems to improve airflow in HVAC installations. They require specialized mounting inside or along the duct channels.
Tools and Equipment Required for Fan Installation
• Screwdrivers (flat-head and Phillips)
• Drill and drill bits
• Voltage tester or multimeter
• Wire strippers and cutters
• Pliers
• Anchors and mounting brackets
• Ladder or scaffolding
• Stud finder (for ceiling and wall installations)
• Electrical box (UL-rated for fan support)
• Wire nuts and electrical tape
• Safety goggles and gloves
Pre-Installation Considerations
- Load Bearing and Mounting Surface Ensure the ceiling or wall can support the weight and movement of the fan. Ceiling fans require fan-rated electrical boxes securely attached to joists or mounting brackets.
- Electrical Compatibility Verify the fan voltage rating matches the household or facility voltage. Check the amperage to ensure circuit compatibility.
- Clearance and Airflow Efficiency Maintain appropriate clearances from walls, ceilings, and furniture. Typically, ceiling fans should be mounted at least 7 feet above the floor and 18 inches from the walls.
- Location-Specific Factors Consider damp-rated or wet-rated fans for areas exposed to humidity or direct water, such as bathrooms, patios, and kitchens.
Installation Steps by Fan Type
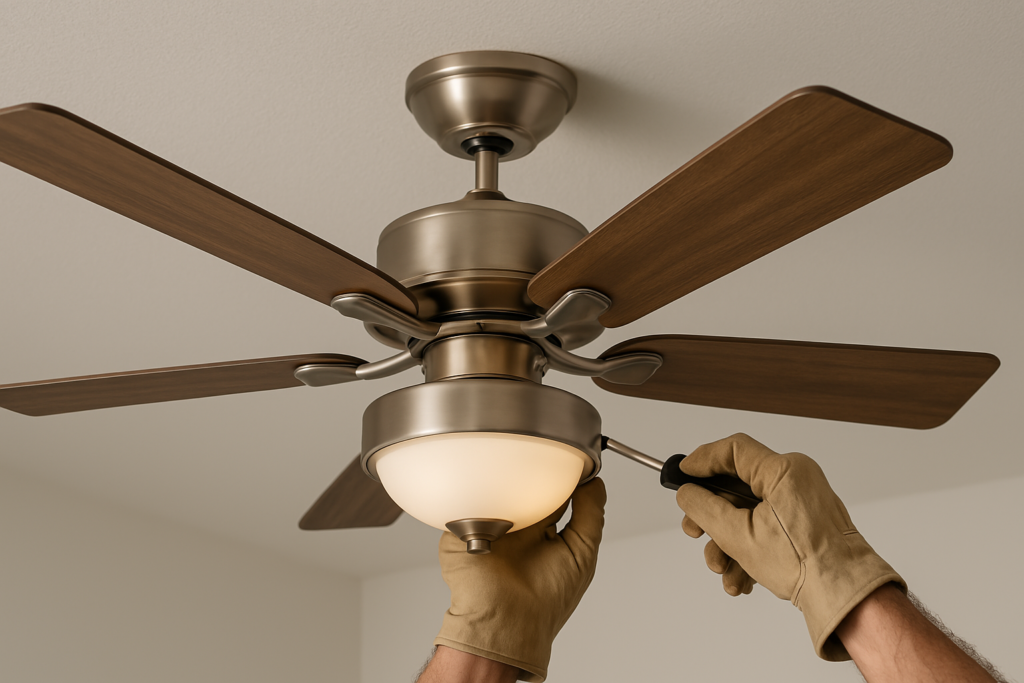
- Ceiling Fan Installation
Step 1: Power Shut-Off Turn off the circuit breaker at the main panel. Use a voltage tester to confirm the power is off.
Step 2: Remove the Existing Fixture If replacing a light or old fan, remove the existing fixture and disconnect the wiring.
Step 3: Install a Fan-Rated Electrical Box Install a UL-listed electrical box rated for fan support. Secure it to a ceiling joist using screws or a retrofit brace.
Step 4: Mounting Bracket Installation Attach the mounting bracket to the electrical box. Ensure it is level and securely fastened.
Step 5: Fan Assembly Assemble the fan components per manufacturer instructions. Install the downrod if applicable.
Step 6: Wiring Connections Typically, connect black (fan motor), blue (light), white (neutral), and green or bare copper (ground). Use wire nuts and electrical tape to secure connections.
Step 7: Secure the Fan to the Bracket Lift the fan assembly and secure it to the bracket. Ensure all screws are tightened.
Step 8: Install Blades and Light Kit Attach fan blades and light kit if included. Use a blade balancing kit if necessary.
Step 9: Restore Power and Test Turn on the breaker and test all fan functions, including speed settings, oscillation, and light operation. - Wall Fan Installation
Step 1: Choose a Location Select a spot with open airflow, at least 7 feet above ground level.
Step 2: Mark the Mounting Points Use a template to mark where to drill. Verify the wall has studs or use anchors.
Step 3: Install the Mounting Bracket Secure the bracket using screws and anchors. Ensure the fan is stable.
Step 4: Connect to Power If hardwired, connect the wires to a switch or wall outlet. Plug-in models require only a wall socket.
Step 5: Mount the Fan Body Attach the fan to the bracket securely. Adjust the tilt and oscillation settings. - Exhaust Fan Installation
Step 1: Choose the Vent Location Locate an exterior wall or roof for venting. Avoid long or convoluted duct paths.
Step 2: Cut the Opening Cut a hole for the fan housing in the wall or ceiling. Ensure the hole matches the fan dimensions.
Step 3: Mount the Fan Housing Secure the housing using screws and brackets. Seal gaps to prevent air leakage.
Step 4: Install Duct and Vent Cover Connect flexible duct to the fan outlet and route it to the outside vent cap.
Step 5: Electrical Wiring Connect wiring to a dedicated switch or timer. Verify ground, neutral, and hot wires are correctly paired.
Step 6: Test the Fan Power on and test the airflow and noise level. - Industrial Fan Installation
Step 1: Site Analysis Evaluate airflow needs based on cubic footage, air changes per hour (ACH), and environmental hazards.
Step 2: Prepare Mounting Surface Install heavy-duty supports or use ceiling beams. Confirm stability for high torque and vibration.
Step 3: Electrical Setup Install industrial-grade circuit breakers and enclosures. Use armored cable or conduit.
Step 4: Mounting the Fan Use lifting equipment if needed. Secure the fan with bolts, ensuring vibration isolation mounts are in place.
Step 5: Final Wiring and Test Connect the fan to power and test motor performance, speed variation, and airflow coverage.
Electrical Wiring Standards and Safety Guidelines
- Always follow NEC (National Electrical Code) or local code standards.
- Use appropriately rated circuit breakers and fuses.
- Label circuits clearly.
- Avoid overloading circuits or using undersized wires.
- Ensure all connections are insulated and secured.
Common Mistakes and How to Avoid Them
- Installing a ceiling fan on a non-fan-rated electrical box
- Incorrect blade assembly leading to wobble
- Inadequate wire connections causing shorts
- Not grounding the fan leading to shock hazards
- Using indoor fans in outdoor or damp locations
Post-Installation Maintenance and Troubleshooting
- Routine Maintenance
• Dust and clean fan blades monthly
• Inspect mounting brackets for looseness
• Lubricate moving parts if applicable
• Check wiring annually - Troubleshooting Common Issues
• Fan not turning on: Check circuit breaker and wire connections
• Noisy operation: Tighten screws, balance blades, inspect motor
• Wobbling fan: Use balancing kit, verify blade alignment
• Weak airflow: Ensure correct blade direction and speed settings
Frequently Asked Questions (FAQs)
Can I install a ceiling fan where a light fixture used to be?
Yes, but you must replace the light-rated electrical box with a fan-rated one.
What is the ideal fan size for a room?
For rooms up to 75 square feet, use a 29–36 inch fan. For 76–144 square feet, 36–42 inches is appropriate. Larger rooms require fans 52 inches or more.
Can I install a fan without a switch? Yes, if the fan has a pull chain or remote control. However, a wall switch is recommended for convenience and safety.
Is it necessary to hire a licensed electrician? For hardwired fans or industrial installations, hiring a licensed electrician ensures code compliance and safety.
Conclusion Fan Installation
Proper fan installation is critical to the safe and efficient operation of air circulation systems. Whether for residential comfort or industrial ventilation, understanding the types of fans, their specific installation requirements, and ongoing maintenance routines is essential. By following best practices in mounting, wiring, and safety compliance, homeowners and technicians can ensure lasting performance and energy efficiency. This comprehensive guide provides all the necessary knowledge and step-by-step processes required for successful fan installation in diverse environments.