Introduction
Fire safety is a critical aspect of building management, whether in residential homes, apartment complexes, offices, warehouses, or retail establishments. One of the most fundamental and cost-effective components of a fire safety system is the alarm and smoke detector.
These devices are designed to detect the early signs of fire—typically smoke or rapid temperature increases—and issue a warning in time for occupants to evacuate or respond.
According to the National Fire Protection Association (NFPA), nearly three out of every five home fire deaths resulted from fires in properties without working smoke alarms.
Despite this staggering statistic, many buildings still lack adequate smoke detection systems, and even more suffer from improper installation or maintenance of such devices.
This comprehensive guide is designed to eliminate these gaps by offering a detailed, technical, and practical roadmap for alarm and smoke detector installation.
Understanding the Basics – What Are Smoke Detectors and How Do They Work?
Smoke detectors are sensors that respond to the presence of smoke particles in the air. They are the first line of defense in detecting fires before flames become visible or destructive. Alarm systems may also include components that detect carbon monoxide, gas leaks, or provide intrusion alerts.
Smoke detection works on two main principles:
• Ionization Detection: Sensitive to fast-burning fires, this type uses a small amount of radioactive material between two electrically charged plates. When smoke enters, it disrupts the ion flow and triggers the alarm.
• Photoelectric Detection: More responsive to slow, smoldering fires. This uses a light beam and a sensor. Smoke entering the chamber scatters the light, which hits the sensor and sets off the alarm.
Dual-sensor detectors combine both technologies to offer comprehensive coverage.
According to the National Fire Protection Association (NFPA), nearly three out of every five home fire deaths resulted from fires in properties without working smoke alarms. Despite this staggering statistic, many buildings still lack adequate smoke detection systems, and even more suffer from improper installation or maintenance of such devices. This comprehensive guide is designed to eliminate these gaps by offering a detailed, technical, and practical roadmap for alarm and smoke detector installation.
Types of Smoke and Alarm Detectors
1. Ionization Smoke Detectors
• Detect small smoke particles typical of flaming fires.
• Generally more affordable.
• Prone to false alarms near kitchens or bathrooms.
2. Photoelectric Smoke Detectors
• Detect larger smoke particles from smoldering fires.
• Less likely to trigger false alarms from cooking.
• Often recommended for residential bedrooms and living areas.
3. Dual-Sensor Smoke Detectors
• Combine both ionization and photoelectric technologies.
• Offer enhanced safety through broad-spectrum fire detection.
• Slightly more expensive but highly recommended for complete protection.
4. Smart Smoke Detectors
• Connect to home Wi-Fi networks.
• Send real-time alerts to smartphones.
• Some models offer voice alerts, carbon monoxide detection, and app integrations.
• Ideal for smart homes and tech-integrated buildings.
5. Heat Detectors
• React to a sharp increase in temperature rather than smoke.
• Suitable for garages, kitchens, and industrial environments.
6. Carbon Monoxide (CO) Detectors
• Often integrated with smoke alarms.
• Detect odorless and colorless CO gas, which is lethal at high levels.
• Mandatory in many jurisdictions for properties with fuel-burning appliances.
Placement Guidelines and Building Code Compliance
Residential Installation Guidelines (Based on NFPA 72)
• Install at least one smoke detector in each bedroom.
• Install a detector outside each sleeping area (e.g., in the hallway).
• At least one detector should be placed on every level of the home, including the basement.
• Mount detectors on the ceiling or high on the wall (4–12 inches below the ceiling).
• Keep detectors at least 10 feet away from cooking appliances to prevent nuisance alarms.
• Do not place detectors near windows, doors, or ducts where airflow might interfere with smoke detection.
Commercial Installation Guidelines
• Follow local jurisdiction and International Building Code (IBC) standards.
• Large commercial spaces may require interconnected systems.
• Multi-zone systems should include a central monitoring panel.
• Fire detectors should be tested and certified according to UL 268 or EN 54-7.
Legal Requirements
• Some regions mandate hardwired detectors with battery backups in new constructions.
• Landlords are often legally obligated to install and maintain working detectors.
• Failure to comply may result in penalties, lawsuits, or loss of insurance coverage.
Tools and Equipment Required for Installation
Before starting your installation, gather the following items:
• Smoke or combination detector unit(s)
• Mounting bracket and hardware (usually included)
• Screwdriver or power drill
• Screws and wall anchors
• Pencil and measuring tape
• Stud finder (for wall installations)
• Wire nuts and electrical tape (for hardwired systems)
• Voltage tester (for electrical safety)
• Ladder or step stool
• Safety gloves and protective eyewear
• User manual or installation guide
Step-by-Step Installation Instructions
For Battery-Powered Detectors
1. Select an Appropriate Location
Mark the ceiling or high wall area free from fans, ducts, or windows.
2. Mount the Bracket
Use the drill to install screws and anchors. Affix the mounting plate securely.
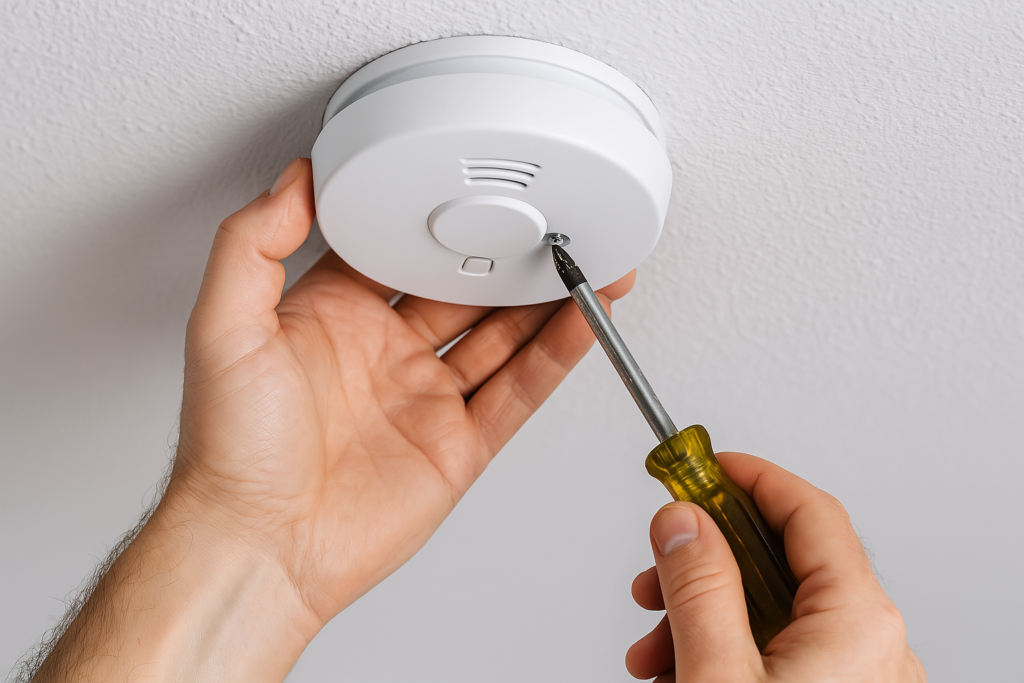
3. Install the Detector
Attach the detector to the bracket by twisting it into place.
4. Insert Batteries and Test
Install fresh batteries, close the compartment, and press the test button. The alarm should sound within seconds.
For Hardwired Detectors
1. Turn Off Power at the Circuit Breaker
Confirm power is off using a voltage tester.
2. Run Electrical Wiring
If retrofitting, use 14/3 NM cable to connect detectors across rooms or levels.
3. Wire the Detector
Connect the black (hot), white (neutral), and red (interconnect) wires according to the manufacturer’s instructions.
4. Mount the Bracket and Detector
Secure the bracket and attach the detector. Ensure all wires are neatly enclosed.
5. Turn Power Back On and Test
Flip the breaker back on and press the test button.

Interconnected Smoke Detector Systems
In interconnected systems, when one alarm detects smoke, all connected alarms sound simultaneously. These systems can be:
• Hardwired with a dedicated red wire for communication.
• Wireless interconnected, communicating through radio frequency signals.
Benefits of interconnected systems include:
• Faster notification across the entire property.
• Compliance with stricter fire safety codes.
• Greater effectiveness in large or multi-level homes and buildings.
Common Installation Mistakes and How to Avoid Them
• Installing too low: Smoke rises, so detectors must be placed high.
• Placing near vents or fans: Airflow can redirect smoke away from sensors.
• Using expired detectors: Most detectors have a 10-year lifespan.
• Neglecting monthly tests: Increases the risk of undetected failure.
• Improper wiring: Can result in non-functioning units or system failure.
Maintenance and Testing Protocols
Routine maintenance is vital for reliability:
• Monthly: Press the test button to ensure proper operation.
• Biannually: Replace batteries (unless using 10-year lithium models).
• Annually: Clean using a vacuum or dry cloth to remove dust buildup.
• Every 10 years: Replace the entire smoke detector unit.
Signs a detector needs maintenance:
• Chirping sounds (low battery or sensor failure)
• No response during testing
• Frequent false alarms
When and How to Replace Smoke Detectors
When to Replace
• After 10 years from the manufacturing date (printed on back of unit)
• If exposed to grease, dust, or water damage
• After consistent false alarms despite cleaning
• When upgrading to smart or interconnected systems
How to Replace
• Turn off power (for hardwired units)
• Remove the old detector and mounting plate
• Disconnect wiring harness (for hardwired)
• Install new bracket and detector
• Restore power and test
Choosing Between DIY and Professional Installation
DIY Installation
• Recommended for battery-powered units
• Cost-effective
• Requires basic tools and safety precautions
• Suitable for single-family homes
Professional Installation
• Mandatory for hardwired or commercial systems
• Ensures compliance with fire codes
• Offers warranty and support
• Certified electricians or fire safety professionals handle wiring and permits
Integrating Smoke Detectors with Modern Smart Home Systems
Smart smoke detectors can be integrated into home automation setups:
• Compatible with Google Home, Amazon Alexa, Apple HomeKit
• Real-time notifications to smartphones
• Remote silencing and self-testing features
• Integration with sprinkler systems or fire departments
Popular brands include Nest Protect, First Alert Onelink, and Kidde Wireless Interconnect.
Conclusion
Installing an alarm or smoke detector is not just a technical task—it’s a life-saving responsibility. Proper selection, placement, wiring, testing, and maintenance are essential to ensuring optimal performance. Whether you’re a homeowner protecting your family, a property manager ensuring tenant safety, or a business owner fulfilling legal obligations, this guide provides everything you need for reliable, code-compliant installation.